Roles on Discord
How to Allow Users to Self-Assign Their Roles on Discord
Discord is a powerful platform for community building, enabling users to create servers tailored to their interests and hobbies. One of the most valuable tools for organizing a server is the use of roles. Roles not only streamline permissions but also allow members to display their interests and status within the community. Common roles might include titles like “Gamer,” “Moderator,” or “Newbie.” However, the traditional process of assigning roles often falls solely on admins and moderators, which can create bottlenecks in larger communities.
To make your Discord server more engaging and efficient, enabling self-assignable roles is an excellent solution. While Discord lacks a built-in feature for self-assigned roles, bots like Dyno Bot can easily bridge the gap. In this guide, we’ll walk you through the steps to set up self-assignable roles using Dyno Bot, and we’ll also explore Akinator as a simpler alternative.

Benefits of Self-Assignable Roles
Before diving into the setup, let’s discuss why self-assignable roles can significantly enhance your server:
- Streamlined Management: Reduces the workload on admins and moderators.
- Enhanced Engagement: Members feel more involved by selecting roles that resonate with their interests.
- Improved Organization: Clearly defined roles help categorize members based on their preferences or expertise.
- Dynamic Communities: Allows members to switch roles easily, keeping the server fresh and adaptable.

How to Set Up Self-Assignable Roles Using Dyno Bot
Step 1: Add Roles to the Server
Before enabling self-assignment, you must create the roles that users can choose from. Here’s how:
- Open the Discord app and navigate to your server.
- Click on Server Settings > Roles.
- Click Create Role.
- Enter a name for the role (e.g., “Gamer” or “Android”).
- Configure the necessary permissions for the role.
- Click Save Changes.
💡 Example: If your server revolves around tech discussions, you could create roles like “Android” and “iOS” to classify members based on their interests.
Step 2: Invite Dyno Bot
To set up self-assignable roles, you’ll need to invite Dyno Bot to your server. Follow these steps:
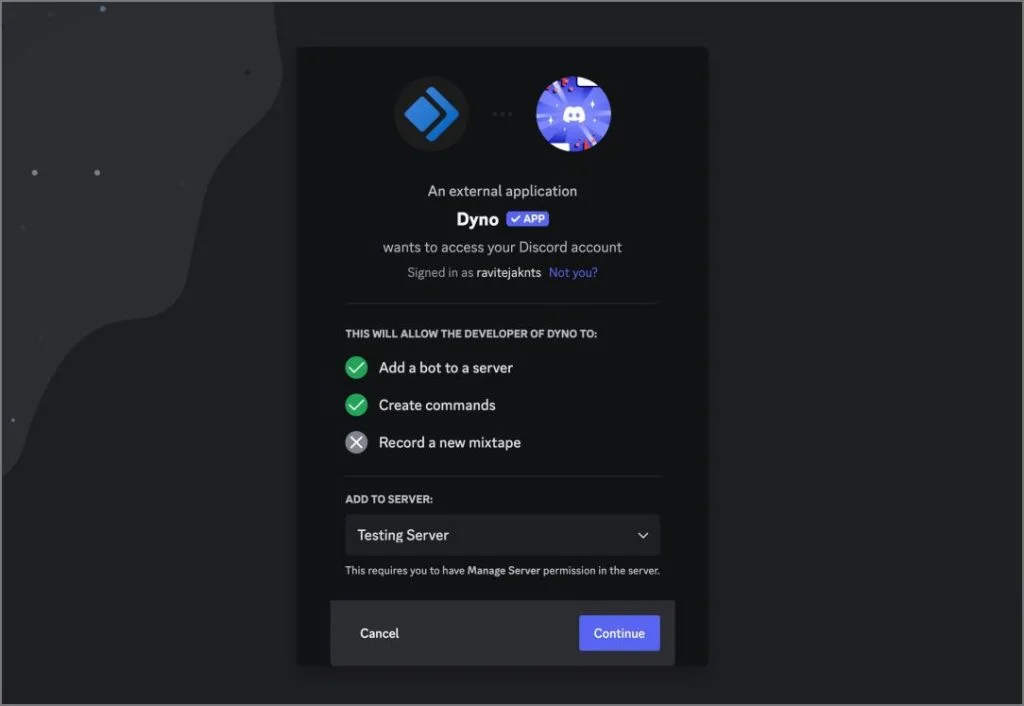
- Visit the Dyno Bot website and click Add to Server.
- Select your server from the list.
- Grant the necessary permissions for Dyno Bot to operate effectively.
Step 3: Configure Dyno Bot Permissions
For Dyno Bot to manage roles, it requires the proper permissions:
- Go to Server Settings > Roles > Default Permissions.
- Ensure that Dyno Bot is placed higher in the role hierarchy than the roles it will assign (e.g., “Android” and “iOS”).
💡 Tip: Roles higher in the hierarchy have more authority, so always keep the bot’s role above assignable roles.

Step 4: Set Up Reaction Roles
Reaction roles allow users to assign themselves roles by interacting with a message. Here’s how to set it up:
- Open the Dyno Bot dashboard and navigate to Modules > Reaction Roles.
- Create a new message:
- Name the message.
- Select the channel where it will appear.
- Choose a message format (plain text, embed, or an existing message).
- Configure the role assignment method:
- Reactions: Assign emojis to roles.
- Buttons: Create clickable buttons for roles.
- Dropdowns: Allow users to select roles from a dropdown list.
- Enter the message content (e.g., “React to assign yourself a role!”).
- Save the configuration, and the message will appear in your server.

Step 5: Customize Reaction Roles
Once the reaction role message is live, you can customize it further:
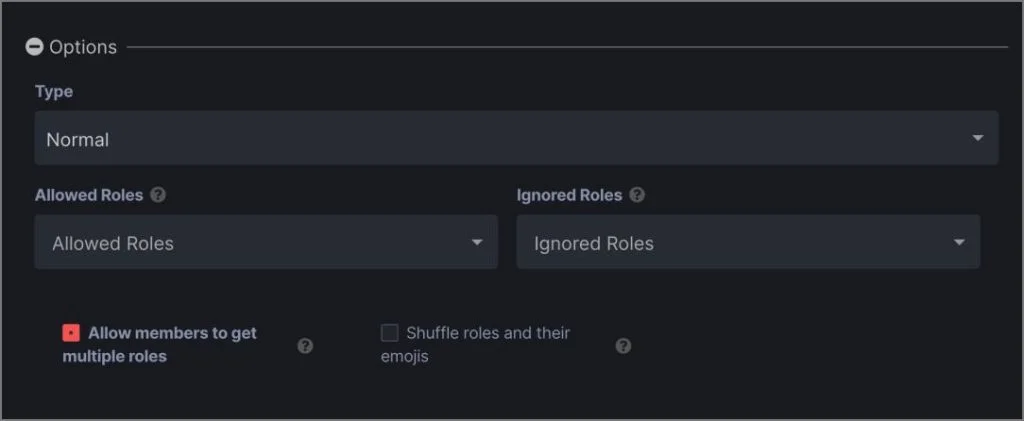
- Specify whether users can select multiple roles.
- Set limits on who can react (e.g., members only).
- Enable or disable shuffling of options to keep roles dynamic.
- Save changes to finalize the setup.
💡 Example: For a gaming server, you might use emojis like 🎮 for “Gamer” and 🕵️ for “Detective Games Enthusiast.”

Akinator: A Simpler Alternative
If you’re looking for a simpler solution, the Akinator bot offers an intuitive way to set up self-assignable roles. While primarily known as a game bot, Akinator also supports reaction roles with an easy setup process.
How to Set Up Akinator
- Install the Akinator bot on your server.
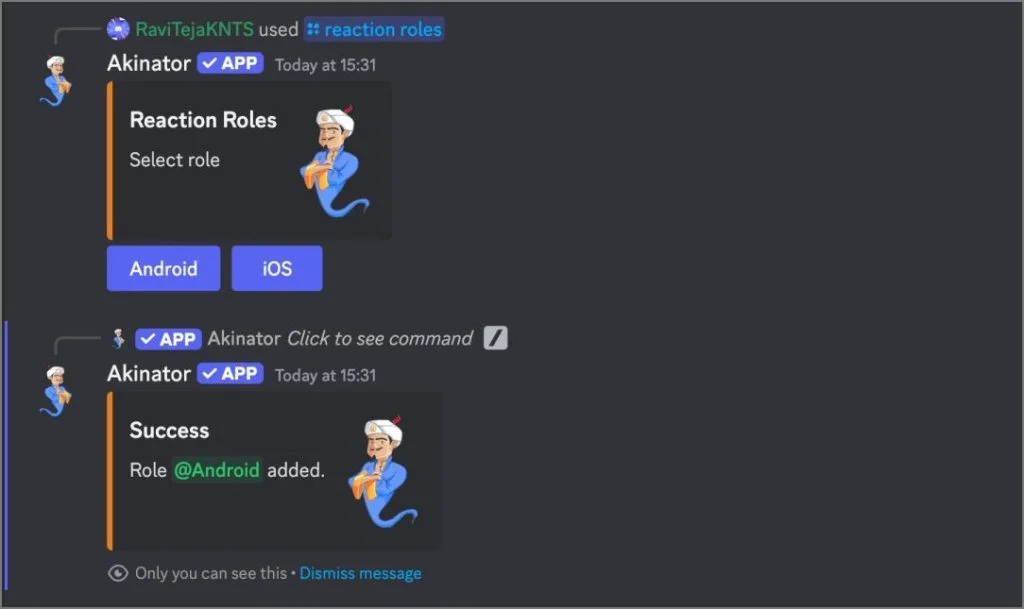
- Type
/reaction rolesand select the Akinator option. - Enter your message content and decide whether users can select multiple roles.
- Add up to 10 roles with labels for buttons.
- Press Enter to send the message.
💡 Tip: Use clear labels and concise instructions to make role selection easier for users.

Conclusion
Enabling self-assignable roles in Discord is an excellent way to foster a more engaging and organized community. By using bots like Dyno Bot or Akinator, you can empower members to personalize their experience while reducing the administrative burden on server staff. Whether you’re managing a small hobby group or a bustling community, this guide equips you with the tools to enhance participation and streamline server management.

Frequently Asked Questions (FAQs)
1. Can I use multiple bots for self-assignable roles?
Yes, you can use multiple bots, but ensure their commands and settings do not conflict. For example, assign one bot for reaction roles and another for moderation.
2. Do self-assignable roles affect server permissions?
No, self-assignable roles only grant the permissions configured for those roles. Users cannot alter server-wide settings.
3. Can I remove a self-assignable role later?
Absolutely! As an admin, you can delete or modify roles anytime through the server settings.
4. Are there limits to how many roles users can choose?
This depends on the bot’s configuration. Dyno Bot, for instance, allows multiple roles, while some bots might restrict users to one role at a time.
5. What should I do if my bot stops working?
If a bot malfunctions, try re-inviting it, ensuring it has the correct permissions, or checking its status on the official website. If issues persist, consider switching to a different bot.

